
Learn about brake light switch functions, importance of inspections, warning signs, testing steps, and how to replace a faulty switch for vehicle safety.When it comes to vehicle safety, ensuring that your brake lights function properly is paramount, and this begins with understanding the brake light switch. This small but essential component is responsible for activating your brake lights whenever you press the pedal. Regular inspections are crucial for maintaining not only your vehicle’s performance but also the safety of yourself and others on the road. In this blog post, we will explore the importance of keeping an eye on your brake light switch, how to identify common warning signs that it may be malfunctioning, and provide you with a detailed step-by-step testing process. In the event you find that your brake light switch is indeed faulty, we will guide you through the replacement process, ensuring that your vehicle remains safe and roadworthy. Let’s dive into the details to help you keep your brake lights shining bright.
Understanding the brake light switch
The brake light switch plays a crucial role in your vehicle’s safety and functionality. It is a small yet essential component that activates the brake lights whenever you press the brake pedal. Understanding its operation can help you maintain your vehicle better and ensure the safety of both you and other drivers on the road.
What is a Brake Light Switch?
The brake light switch is an electrical switch that signals the brake lights to turn on when the brake pedal is engaged. This action notifies other drivers that you are slowing down or stopping. Typically located near the brake pedal, the switch can be either a mechanical push-button type or an electronic version, depending on the vehicle model.
How Does It Work?
When you press the brake pedal, the switch closes the electrical circuit, allowing current to flow to the brake lights. This causes them to illuminate, providing a clear indication to vehicles behind you. Once you release the brake pedal, the switch opens the circuit, turning off the lights.
Why is it Important?
- Safety: Properly functioning brake lights are vital for vehicle safety. They ensure that other drivers are aware of your intentions on the road.
- Legal Compliance: In many regions, malfunctioning brake lights can lead to fines and penalties.
- Preventing Accidents: A burnt-out brake light can lead to rear-end collisions, as drivers behind you may not realize you are slowing down or stopping.
Common Issues with Brake Light Switches
Understanding potential problems can help you troubleshoot issues with the brake light switch. Some common problems include:
- Brake Lights Stuck On: This may indicate a faulty switch that does not return to its open position.
- Brake Lights Not Functioning: This could signal a broken switch or possibly a blown fuse in the circuit.
- Intermittent Operation: A switch that operates sporadically may require inspection for loose connections or internal failure.
By understanding your vehicle’s brake light switch, you can monitor and maintain this important component more effectively, ensuring that your brake lights function properly for safe driving.
Importance of regular inspections
Regular inspections of your vehicle’s brake light switch are crucial for ensuring road safety. The brake light switch is an essential component of your vehicle’s lighting system that not only helps communicate your intentions to other drivers but also affects other critical systems in the vehicle.
Here are a few reasons why regular inspections of the brake light switch should not be overlooked:
- Improved Visibility: Ensuring that your brake lights function correctly improves your visibility on the road. This allows other drivers to react accordingly when you are slowing down or stopping.
- Prevention of Accidents: A faulty brake light switch can lead to confusion among other drivers, increasing the likelihood of rear-end collisions. Regular inspections can help prevent these potentially dangerous situations.
- Compliance with the Law: Many regions have strict laws regarding vehicle lighting systems, including brake lights. Regular inspections and maintenance help ensure your vehicle remains compliant, avoiding potential fines.
- Cost-Effective Maintenance: Detecting a problem early can save you money on repairs. If the brake light switch is inspected regularly, any issues can be addressed before they become major problems.
To summarize, regular inspections of your vehicle’s brake light switch are vital for ensuring not only your safety but also that of others on the road. Prioritize these inspections to maintain a well-functioning braking system.
Identifying common warning signs
Identifying issues with your brake light switch early can save you time and prevent more serious problems down the road. Here are some common warning signs that may indicate your brake light switch is malfunctioning:
- Brake Lights Not Turning On: If your brake lights do not illuminate when you press the brake pedal, this is often the first sign of a faulty switch.
- Brake Lights Staying On: Conversely, if your brake lights remain illuminated even when you are not pressing the pedal, this could also indicate a problem with the brake light switch.
- Warning Light on Dashboard: Some vehicles may trigger a warning light on the dashboard if there is an issue with the brake light system.
- Inconsistent Brake Light Function: If your brake lights flicker or operate intermittently, this could be due to a faulty switch that does not maintain a consistent connection.
- Vehicle Not Starting: In certain cases, a malfunctioning brake light switch may prevent your vehicle from starting, especially in cars with safety features that require the brake pedal to be pressed.
If you notice any of these signs, it’s essential to investigate the issue further. A malfunctioning brake light switch not only poses a safety risk but can also lead to legal penalties for non-functioning lights.
Always consult with a qualified technician if you’re uncertain—safety should always be your top priority!
Step-by-step testing process
Testing your brake light switch is crucial for ensuring that your brake lights function properly, enhancing your safety on the road. Below is a comprehensive step-by-step testing process to help you check the functionality of your brake light switch.
Tools Needed
- Multimeter
- Screwdriver
- Basic automotive toolkit
- Assistant (optional)
Step 1: Safety First
Before you begin, ensure the vehicle is parked on a flat surface. Turn off the engine and remove the keys from the ignition to avoid any electrical issues.
Step 2: Locate the Brake Light Switch
The brake light switch is usually located near the brake pedal’s pivot point. You may need to remove some panels or covers to access it. Here’s how:
- Gently pry off the panel covering the brake pedal area.
- Locate the brake light switch—it is typically a small component attached to the pedal assembly.
Step 3: Visual Inspection
Examine the brake light switch for any visible signs of wear or damage, such as:
- Cracks or broken plastic
- Corrosion on electrical connectors
- Loose wires
Step 4: Test for Continuity
Using a multimeter, follow these steps to test for continuity:
- Set the multimeter to the ohmmeter setting.
- Disconnect the wiring harness from the brake light switch.
- Connect one lead of the multimeter to one terminal of the switch and the other lead to the second terminal.
- Press the brake pedal—if the switch is working, the multimeter should show a reading close to zero ohms.
- Release the brake pedal—the reading should indicate infinite resistance (open circuit).
Step 5: Final Check
If your tests indicate a malfunction, you will need to replace the brake light switch. To do this:
- Remove the screws holding the switch in place.
- Disconnect the wiring harness.
- Install the new brake light switch by reversing the removal steps.
After completing the replacement, test the brake lights to ensure everything functions correctly.
Additional Tips
Here are a few additional tips to remember:
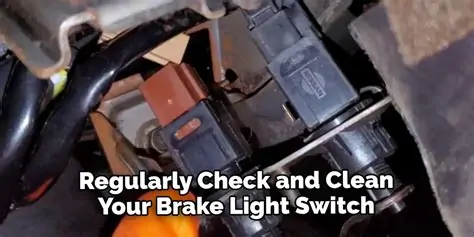
- Regularly check the brake light switch during vehicle maintenance.
- If you’re unsure about any step, consult the vehicle’s service manual or seek professional help.
Replacing a faulty brake light switch
When your vehicle’s brake light switch fails, it can lead to various issues, including malfunctioning brake lights and safety concerns. Here’s a comprehensive guide on how to replace a faulty brake light switch, ensuring you can drive safely and confidently.
Tools and Materials Needed
- New brake light switch
- Screwdriver
- Wrench
- Socket set
- Safety gloves
- Owner’s manual
Step-by-Step Guide to Replacing the Brake Light Switch
- Prepare the Vehicle: Park your vehicle on a flat surface and turn off the ignition. Disconnect the negative terminal of the battery to ensure safety.
- Locate the Brake Light Switch: Refer to your owner’s manual to find the exact location of the brake light switch, typically found near the brake pedal.
- Remove the Old Switch: Using a screwdriver or wrench, carefully detach the old brake light switch from its mount. Be cautious not to damage any surrounding components.
- Disconnect the Wiring Harness: Gently pull apart the wiring harness connected to the old switch. Ensure not to pull on the wires themselves to avoid damage.
- Install the New Brake Light Switch: Connect the wiring harness to the new brake light switch. Then, mount the new switch securely in place.
- Reconnect the Battery: Once the new switch is installed, reconnect the negative terminal of the battery.
- Test the New Switch: Press the brake pedal and check if the brake lights illuminate. If they do, the installation was successful!
Safety Tip: Always refer to your vehicle’s owner manual for specific instructions related to your model and ensure that you have the correct replacement parts.
Common Mistakes to Avoid
- Forgetting to disconnect the battery: Always disconnect the battery to prevent electrical shocks.
- Using incorrect parts: Ensure the new brake light switch is compatible with your vehicle.
- Neglecting other components: Check the wiring and connectors for any damage while replacing the switch.
By following these steps, you can effectively replace a faulty brake light switch and enhance your vehicle’s safety features. Don’t overlook this crucial component, as it plays a vital role in signaling your stopping intentions to other road users.
Frequently Asked Questions
What is a brake light switch?
A brake light switch is an electrical component that activates the brake lights when the brakes are applied, indicating to other drivers that the vehicle is slowing down or stopping.
Why is it important to check the brake light switch?
Regularly checking the brake light switch is important for safety. A malfunctioning switch can prevent the brake lights from working, which could lead to accidents as other drivers may not be aware of your stopping intentions.
How can you tell if your brake light switch is faulty?
Signs of a faulty brake light switch include the brake lights not illuminating when the brake pedal is pressed, the brake lights staying on when the pedal is not pressed, or an illuminated warning light on the dashboard.
What tools do you need to check the brake light switch?
To check the brake light switch, you typically need a multimeter to test for electrical continuity, as well as basic hand tools like a screwdriver or wrench to access the switch.
Can you easily replace a brake light switch yourself?
Yes, replacing a brake light switch is generally a straightforward task that many car owners can do themselves with basic tools and knowledge of their vehicle.
What should you do if the brake light switch is faulty?
If the brake light switch is found to be faulty, it should be replaced immediately to ensure the proper functioning of the brake lights and maintain safety on the road.
How often should you check your brake light switch?
It is a good practice to check your brake light switch during regular vehicle maintenance or whenever you notice issues with your brake lights.