
Learn about the Check Gauges Light, its causes and impact on braking, troubleshooting tips, and preventive maintenance to ensure safe driving.When it comes to our vehicles, seeing warning lights illuminate on the dashboard can evoke a sense of urgency and concern. Among these indicators, the check gauges light is particularly noteworthy, especially when it activates during braking. This blog post will delve into the significance of the check gauges light, exploring its potential causes and how it can impact your braking performance. Understanding the intricacies of this warning light is crucial for any vehicle owner, as it could signify underlying issues that require attention. We’ll guide you through troubleshooting steps and preventive maintenance tips to help you keep your vehicle in optimal condition. Stay tuned as we explore everything you need to know about the check gauges light and its relationship with the braking system.
Understanding the Check Gauges Light
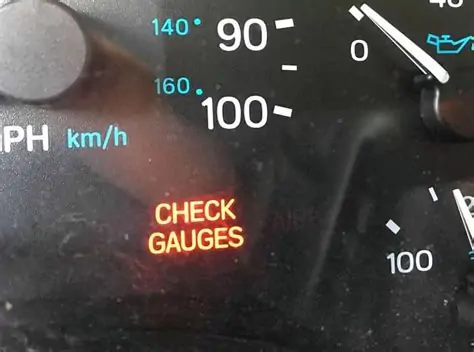
The Check Gauges Light is a critical aspect of your vehicle’s instrument panel, designed to keep you informed about various operational conditions. This indicator is primarily aimed at alerting drivers to potential issues with vital systems within the vehicle. Ignoring this warning could lead to significant damage or safety concerns.
Typically, the Check Gauges Light monitors the following parameters:
- Oil Pressure: Low oil pressure can indicate serious engine problems.
- Coolant Temperature: An overheating engine may lead to catastrophic failures.
- Battery Voltage: Issues with voltage can affect the vehicle’s ability to start and operate effectively.
When the Check Gauges Light illuminates, it may be accompanied by other warning lights on the dashboard. This integration is crucial for pinpointing which system is experiencing issues, allowing for timely interventions.
What Happens When the Light Comes On?
When the Check Gauges Light comes on, it’s essential to *not* ignore it. Instead, consider the following steps:
- Pull Over Safely: If you see the light activate while driving, find a safe location to stop.
- Check the Gauges: Look at the related gauges to identify what might be causing the alert.
- Consult the Owner’s Manual: Refer to the vehicle’s manual for specific guidance related to the warning.
- Seek Professional Help: If uncertain, it’s best to have a mechanic examine the vehicle.
In conclusion, understanding the Check Gauges Light is vital for maintaining your vehicle’s health and ensuring safe driving conditions. Stay vigilant and proactive whenever this light appears on your dashboard.
Causes of Check Gauges Light when Braking
When the check gauges light illuminates while braking, it can be an alarming experience for any driver. Understanding the potential causes of this warning light is crucial for maintaining vehicle safety and performance. Here are some common reasons why the check gauges light may come on during braking:
- Low Brake Fluid Level: One of the primary causes of the check gauges light activating is a low brake fluid level. This can lead to reduced braking efficiency and should be checked immediately.
- Brake System Malfunction: Any issues within the brake system, such as a malfunctioning master cylinder, can trigger the check gauges light. It’s essential to investigate further to ensure your brakes are working correctly.
- Electrical Issues: Faulty wiring or poor connections within the dashboard can lead to erroneous readings of the gauge system, causing the light to activate unexpectedly.
- Overheating Brakes: If brakes are overheating due to continual heavy braking or a stuck caliper, the check gauges light could come on, indicating a problem that requires immediate attention.
- Sensor Failures: Many modern vehicles are equipped with sensors that monitor various systems. A failed sensor in the braking system can erroneously trigger the check gauges light.
It is vital to address any triggering of the check gauges light promptly. Ignoring the issue can lead to serious safety risks on the road.
“When in doubt, have your vehicle checked by a professional to avoid potential hazards caused by unaddressed warning lights.”
Impact of Check Gauges Light on Braking
The Check Gauges Light on your vehicle’s dashboard serves as a crucial indicator of various systems operating within your car. When this light illuminates, particularly during braking, it can signify a range of underlying issues that may impact your vehicle’s performance and safety.
Understanding the impact of the Check Gauges Light on braking performance is essential for drivers. Below are some key points to consider:
- Braking Efficiency: When the Check Gauges Light activates while braking, it may indicate that the brake fluid level is low or that there is an issue with the braking system itself. This can lead to decreased braking efficiency, making it essential for drivers to act promptly.
- Warning of Potential Failures: The appearance of the Check Gauges Light can serve as an early warning for potential failures in the vehicle’s systems. Ignoring this light, especially when it appears during braking, may result in more significant issues that could compromise your safety on the road.
- Increased Stopping Distance: If the vehicle’s systems are malfunctioning, the stopping distance may increase significantly. This is particularly dangerous in emergency braking situations where every fraction of a second counts.
- Driver Awareness: A glowing Check Gauges Light essentially demands the driver’s attention and should not be ignored. It often requires the driver to rethink their driving strategy, especially in high-stakes driving conditions.
To summarize, the Check Gauges Light can have a profound impact on braking. Maintaining awareness and addressing any issues promptly is crucial for ensuring both your safety and the safety of others on the road.
For any persistent or concerning dashboard light signals, it’s always recommended to consult with a qualified technician to diagnose and resolve underlying issues.
Troubleshooting the Check Gauges Light
The Check Gauges Light on your dashboard is a critical indicator that can help you maintain your vehicle’s health. When this light comes on, especially during braking, it’s essential to interpret its meaning accurately and act accordingly. Below are some steps and tips to troubleshoot the Check Gauges Light.
1. Identify the Warning
The Check Gauges Light itself does not specify which gauge is malfunctioning; it could relate to various systems including:
- Engine Temperature
- Oil Pressure
- Fuel Level
- Battery Voltage
- Brake Fluid Level
2. Conduct a Visual Inspection
Before diving into deeper diagnostics, conduct a visual inspection of the dashboard gauges. Check for any abnormalities in:
| Gauge | Normal Range | What to Look For |
|---|---|---|
| Engine Temperature | 180-220°F | High Temperature Indicator |
| Oil Pressure | 20-60 PSI | Low Pressure Indicator |
| Fuel Level | 1/4 Tank | Empty Indicator |
| Battery Voltage | 12.6-14.4 Volts | Low Voltage Warning |
| Brake Fluid Level | Minimum Marker | Low Fluid Warning |
3. Check for Diagnostic Trouble Codes (DTCs)
Use an OBD-II scanner to check for any Diagnostic Trouble Codes (DTCs). These codes can provide insight into which specific system is malfunctioning and help you pinpoint the issue.
Trouble codes will guide you in diagnosing vehicle issues more effectively, making troubleshooting significantly easier.
4. Inspect Fluid Levels
Low fluid levels can trigger the Check Gauges Light. Ensure you check:
- Brake Fluid
- Oil Level
- Coolant Level
- Transmission Fluid
5. Monitor Brake Performance
If the light activates during braking, pay particular attention to your brake performance. If the brakes feel soft, spongy, or unresponsive, it’s crucial to address these issues immediately, as they can indicate brake fluid leakage or other brake system malfunctions.
6. Consult a Professional Mechanic
If you’ve gone through the above steps and the Check Gauges Light remains illuminated, it’s advisable to consult a professional mechanic. They have the tools and expertise to dive deeper into the vehicle’s electrical systems and sensor arrangements.
By following these troubleshooting steps, you can effectively address the reasons for the Check Gauges Light activation in your vehicle when braking. Regular monitoring and timely action will ensure that your vehicle operates safely and efficiently.
Preventive Maintenance for Check Gauges Light
The Check Gauges Light is an important indicator that can alert drivers to potential issues with their vehicle. Preventive maintenance is crucial in ensuring that this light functions correctly and does not illuminate unnecessarily. Here are some best practices for maintaining your vehicle’s gauge system:
1. Regular Inspections
- Conduct regular visual inspections of your vehicle’s dashboard.
- Pay special attention to any abnormalities or warning lights.
2. Monitor Fluid Levels
- Check and maintain the levels of essential fluids, such as brake fluid, engine oil, and coolant.
- Low fluid levels can trigger the Check Gauges Light when braking.
3. Battery Maintenance
- Ensure that your vehicle battery is in good condition.
- Regularly check for corrosion and test the voltage.
4. Electrical System Check
- Examine the vehicle’s electrical system and wiring for any signs of wear or damage.
- Faulty wiring can lead to false warnings from the Check Gauges Light.
5. Brake System Maintenance
- Conduct routine maintenance on the brake system, including checking brake pads and lines.
- Make sure that the brake fluid is at the correct level and is free of contamination.
6. Dashboard Warning Lights
Familiarize yourself with your vehicle’s dashboard warning lights, including the Check Gauges Light. Understanding what each light indicates can help you respond promptly to any issues.
7. Use Quality Parts
- Whenever repairs are necessary, make sure to use high-quality replacement parts.
- This can help prevent future issues associated with the Check Gauges Light.
By following these preventive maintenance tips, you can significantly reduce the chances of the Check Gauges Light coming on unnecessarily when you brake and ensure the overall health of your vehicle.
Frequently Asked Questions
What does it mean when the check gauges light comes on while braking?
The check gauges light indicates that one or more of your vehicle’s gauge readings are outside the normal range. When it comes on while braking, it may suggest a problem with the braking system or engine performance.
Is it safe to drive when the check gauges light is on?
It’s generally not safe to drive when the check gauges light is illuminated, especially if it coincides with braking. It’s advisable to pull over and assess the situation or consult a mechanic.
What should I do if I see the check gauges light while driving?
If you see the check gauges light while driving, safely reduce speed and pull over to a safe location. Check your vehicle’s gauges for any abnormalities, and if necessary, seek professional assistance.
Can low fluid levels trigger the check gauges light?
Yes, low fluid levels in systems like the brake fluid or engine coolant can trigger the check gauges light, especially if the warning is related to a drop in pressure or performance.
How can I diagnose the issue when the check gauges light comes on?
To diagnose the issue, you can start by checking the dashboard gauges for any abnormalities in oil pressure, temperature, or battery levels. Using an OBD-II scanner can also help identify specific trouble codes.
Could there be a connection between brake issues and the check gauges light?
Yes, there can be a connection. Brake issues may affect engine performance or fluid distribution, prompting the check gauges light to illuminate if the vehicle’s systems detect an anomaly.
Should I consult a mechanic immediately if the check gauges light comes on?
Yes, it’s advisable to consult a mechanic immediately if the check gauges light comes on, especially if it occurs while braking or is accompanied by unusual vehicle behavior.