
Learn about brake line check valves, their importance, signs of faults, testing methods, and replacement tips for optimal vehicle safety.When it comes to vehicle safety, every component plays a crucial role, and the brake line check valve is no exception. This small yet significant device ensures that the brake fluid remains pressurized in the system, allowing for effective stopping power when you need it most. In this blog post, we’ll delve into the essentials of the brake line check valve, exploring what it is and why its functionality is vital for your vehicle’s braking system. We’ll also discuss the warning signs of a faulty check valve, providing you with the knowledge to identify potential issues early. Plus, we’ll guide you on how to test the check valve and walk you through the replacement process if it turns out to be malfunctioning. Join us as we unravel the importance of this often-overlooked component in maintaining your vehicle’s safety and performance on the road.
What is a Brake Line Check Valve?
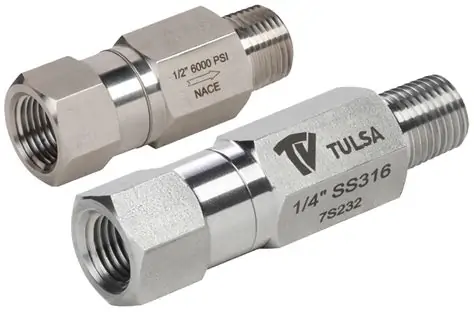
A Brake Line Check Valve is a crucial component of a vehicle’s braking system, designed to ensure optimal performance and safety. This small yet significant valve controls the flow of brake fluid, preventing backflow and maintaining hydraulic pressure in the brake lines.
In essence, the check valve acts as a one-way gate. When the brakes are applied, the valve opens to allow brake fluid to flow towards the brake calipers or wheel cylinders, facilitating the braking action. When the brakes are released, the valve closes, stopping the fluid from flowing back into the brake lines. This action helps maintain the pressure necessary for effective braking.
Key Functions of a Brake Line Check Valve:
- Prevention of Backflow: Ensures that brake fluid does not flow backward, which can lead to a decrease in braking efficiency.
- Maintenance of Pressure: Retains hydraulic pressure within the braking system, providing quicker and more responsive braking.
- Protection Against Air Contamination: Helps prevent air from entering the brake lines, which can compromise braking effectiveness.
Overall, understanding the function and importance of the brake line check valve is vital for both vehicle owners and mechanics. Regular checks and maintenance of this component can significantly enhance the safety and performance of a vehicle’s braking system.
Importance of Brake Line Check Valve
The brake line check valve plays a critical role in the overall safety and performance of your vehicle’s braking system. This small yet essential component ensures that brake fluid maintains proper pressure in the brake lines, helping to prevent any potential failure in the braking system.
Here are some of the key reasons why the brake line check valve is so important:
- Prevents Backflow: The primary function of the brake line check valve is to prevent the backflow of brake fluid, ensuring that the pressure is maintained for effective braking.
- Improves Brake Response: By keeping fluid pressure stable, the check valve enhances the responsiveness of the brakes, providing better control when stopping.
- Increases Safety: A malfunctioning check valve can lead to a decrease in braking power, increasing the risk of accidents. Therefore, a properly functioning valve is essential for safe driving.
- Reduces Brake System Wear: By maintaining consistent pressure, the check valve reduces wear and tear on other components of the braking system, potentially extending their lifespan.
In summary, the brake line check valve is vital for ensuring a safe and responsive braking experience. Regular checks and maintenance of this component can prevent costly repairs and enhance your vehicle’s overall performance.
Signs of a Faulty Check Valve
A brake line check valve plays a crucial role in the performance and safety of your vehicle’s braking system. When this component is malfunctioning, it can significantly impact your vehicle’s overall functionality. Here are some signs of a faulty check valve that every driver should be aware of:
- 1. Spongy Brake Pedal: If you notice that your brake pedal feels weak or spongy, this could indicate a problem with the check valve. A functioning check valve ensures that brake fluid is maintained at the correct pressure.
- 2. Brake Fluid Leaks: Visible signs of brake fluid leaking near the check valve can signal a failure. Check for puddles of fluid under your vehicle or wet spots around the brake lines.
- 3. Warning Light: Many modern cars are equipped with a brake warning light on the dashboard. A malfunctioning check valve may trigger this warning light, alerting you to potential issues in the braking system.
- 4. Reduced Stopping Power: If you experience a decrease in your vehicle’s braking efficiency, your check valve may not be functioning properly. Be vigilant if your vehicle takes longer to stop than usual.
- 5. Unusual Noises: Pay attention to any unusual hissing or whistling sounds when you apply the brakes. These noises can indicate that air is leaking into the brake system, which can be a sign of a faulty check valve.
- 6. Brake Drag: If your vehicle is pulling to one side while braking or if the brakes feel like they’re dragging, it could be a sign of issue with the check valve, affecting fluid flow and pressure.
If you observe any of these signs, it’s essential to have your brake line check valve inspected by a professional mechanic. Addressing issues early can help you avoid more significant problems down the road, ensuring your vehicle’s braking system remains safe and effective.
How to Test the Check Valve
The brake line check valve is a crucial component in ensuring that your vehicle’s braking system functions properly. Testing the check valve is essential to confirm that it is performing its intended function. Here’s how you can test the check valve effectively:
Tools Needed
- Brake fluid
- Wrench set
- Vacuum gauge
- Clean cloths
- Bucket or container to catch fluid
Step-by-Step Procedure
- Safety First: Ensure your vehicle is parked on a level surface. Turn off the engine and engage the parking brake.
- Gather Tools: Collect all necessary tools and materials needed for testing.
- Locate the Check Valve: Identify the location of the check valve in the brake system, typically found on the master cylinder or near the brake lines.
- Inspect for Leaks: Check for any visible signs of leaks around the check valve, which may indicate a failure.
- Remove the Check Valve: Use your wrench to carefully disconnect the check valve from the brake line. Have your bucket ready to catch any leaking brake fluid.
- Function Testing: Use a vacuum gauge to test the check valve. Connect the vacuum gauge to one side of the valve and create a vacuum. A functioning valve should hold the vacuum without any drops.
- Reverse Flow Test: Flip the check valve around and apply a vacuum to the opposite end. The valve should not allow any flow. If it does, the check valve is faulty.
- Clean and Reassemble: If the check valve is working properly, clean it with a clean cloth and reinstall it securely.
- Refill Brake Fluid: Make sure to refill any brake fluid that may have escaped during the test.
- Test Drive: Before hitting the road, conduct a quick check of your brakes to ensure they’re functioning properly.
Quote on Importance
The brake line check valve is a small yet significant component that plays a pivotal role in overall vehicle safety.
By following these steps, you can effectively test your brake line check valve, ensuring your vehicle’s braking system remains in optimal working condition.
Replacing a Brake Line Check Valve
When it comes to maintaining vehicle safety, the brake line check valve plays a critical role. If you find yourself needing to replace this essential component, follow these steps to ensure a successful installation.
Tools and Materials Needed
- Replacement brake line check valve
- Wrench set
- Brake fluid
- Pipe cleaner or cloth
- Brake line tubing cutter (if necessary)
- Torque wrench
Steps to Replace the Brake Line Check Valve
- Safety First: Always start by ensuring the vehicle is on a stable surface. Secure it with wheel chocks and engage the parking brake.
- Locate the Check Valve: The brake line check valve is typically found in line with the brake hoses. Consult your vehicle’s service manual for the exact location.
- Disconnect the Brake Lines: Using a wrench, carefully loosen the fittings connecting the brake lines to the check valve. Be prepared for some brake fluid to leak out – it’s a good idea to have a cloth handy.
- Remove the Old Check Valve: Once the brake lines are disconnected, remove the old check valve by turning it counterclockwise. If it seems stuck, you may need to use penetrating oil.
- Clean the Area: Before installing the new valve, clean the area where the valve will be seated to prevent contamination and ensure a proper seal.
- Install the New Check Valve: Thread the new brake line check valve into place. Make sure to tighten it securely, but avoid over-tightening, which could damage the threads.
- Reconnect the Brake Lines: Reattach the brake lines to the new check valve. Use the wrench to ensure a snug fit, checking for any signs of cross-threading.
- Bleed the Brakes: After installation, it’s crucial to bleed the brake system to remove any air that may have entered. This is done by having someone pump the brake pedal while you open the bleeder valve at the farthest brake from the master cylinder.
- Check for Leaks: Once bleeding is complete, check all connections for leaks. Add more brake fluid as necessary.
- Final Inspection: Ensure all tools are cleared from the area and test drive the vehicle at low speeds to confirm the brakes engage properly.
By following these steps, you can effectively replace a brake line check valve and maintain your vehicle’s braking system. Remember, if you’re not confident in performing this task yourself, it’s wise to seek help from a professional mechanic.
Frequently Asked Questions
What is a brake line check valve?
A brake line check valve is a component in a vehicle’s braking system that prevents the backflow of brake fluid, helping to maintain pressure in the braking system and ensuring effective brake performance.
Why is a check valve important for brake lines?
The check valve is crucial because it keeps brake fluid from flowing backward, which can lead to brake failure or reduced braking efficiency. It ensures that the brake system retains the necessary pressure for reliable operation.
How often should I check my brake line check valve?
It’s recommended to inspect your brake line check valve during regular vehicle maintenance or if you notice any issues with braking performance. Typically, this can be part of your annual vehicle check-up.
What are the signs of a failing brake line check valve?
Signs of a failing brake line check valve include a spongy brake pedal, uneven braking, or fluid leaks. If you experience any of these symptoms, it’s important to have your braking system inspected immediately.
Can I replace a brake line check valve myself?
While replacing a brake line check valve is possible for someone with mechanical knowledge, it is recommended to have it done by a professional since proper installation is crucial for the safety and function of the braking system.
What materials are brake line check valves typically made from?
Brake line check valves are typically made from durable materials such as brass, aluminum, or high-strength plastics, designed to withstand the high pressure and corrosive nature of brake fluid.
Are all vehicles equipped with a brake line check valve?
Not all vehicles have a dedicated brake line check valve. Some braking systems are designed without one, relying on other components to maintain hydraulic pressure. It’s essential to check your vehicle’s specifications to know if it includes this feature.