
Learn how to identify worn brake pads through visual inspections, flashlight examination, thickness measurement, and when to consult a professional mechanic for safety.When it comes to vehicle safety, ensuring your brake pads are in optimal condition is crucial. Regular maintenance can prevent costly repairs and avoid dangerous situations on the road. But what if you don’t have the time or tools to remove your wheels for a thorough check? Fortunately, there are effective methods to assess the condition of your brake pads without taking off the wheels. In this blog post, we will explore the signs of worn brake pads, guide you through a visual inspection, and suggest how a flashlight can help illuminate potential issues. Additionally, we’ll discuss measuring brake pad thickness and when it’s best to consult a professional mechanic. By the end of this post, you’ll be equipped with the knowledge to keep your brakes in check, ensuring a safer driving experience.
Signs of worn brake pads
Identifying the signs of worn brake pads is crucial for your safety on the road. As brake pads wear down, they can lead to a decrease in braking efficiency and potentially endanger both you and your passengers. Here are some telltale signs to look out for:
- Squeaking or squealing noise: A high-pitched noise when applying the brakes often indicates that the brake pads are worn and need replacement.
- Grinding sound: If you hear a grinding noise, it usually means the brake pads are completely worn out, and the metal backing is grinding against the brake rotor.
- Vibration or pulsation: Feeling a vibration in the brake pedal can suggest that the brake pads are unevenly worn or have become warped.
- Brake warning light: Many vehicles are equipped with a brake warning light on the dashboard that activates when the brake pads are low on material.
- Pulling to one side: If your vehicle pulls to one side when braking, this may indicate uneven brake pad wear on one side.
- Reduced brake responsiveness: If you find that you have to press the brake pedal harder than usual to stop the vehicle, it may be time to inspect your brake pads.
Being aware of these signs can help you avoid more serious brake issues and ensure that your vehicle remains safe to drive.
Visual inspection of brake pads
Conducting a visual inspection of your brake pads is an essential part of regular vehicle maintenance. It allows you to assess the condition of the brake pads without the need to remove the wheels. Below are some key indicators you should look for during your visual inspection:
- Thickness: Look for the thickness of the brake pads. Ideally, they should be at least 1/4 inch thick. If they appear significantly thinner, they may need to be replaced.
- Worn Surface: Inspect the surface of the brake pads for signs of wear or unevenness. If you see grooves or worn areas, it’s a clear indication that the pads are wearing out.
- Cracks or Chips: Check for any visible cracks or chips in the brake pads. Cracks can indicate that the material is compromised and may lead to brake failure.
- Debris: Look for any debris or foreign materials lodged between the brake pad and rotor. This can affect braking performance and can lead to further damage.
During this inspection, you can also observe the brake rotor for any damage. Look for scoring or discoloration, which can be a sign of a more significant issue that may require attention.
An ounce of prevention is worth a pound of cure. – Benjamin Franklin
To ensure accurate assessment, it’s recommended to conduct the visual inspection regularly, particularly when experiencing any signs of braking issues.
Using a flashlight for examination
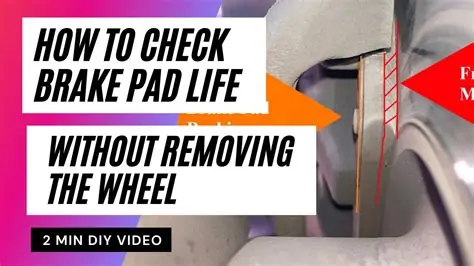
When it comes to checking your brake pads without removing the wheel, one of the most effective tools you can use is a flashlight. A flashlight allows you to get a closer look at your brake system, especially in the tighter areas that may be hard to see with the naked eye.
Here’s how to utilize a flashlight for a thorough examination:
- Park Safely: Always ensure your vehicle is parked on a flat surface and that the engine is turned off before attempting any examination.
- Locate the Brake Assembly: Position yourself near the wheel and locate the brake assembly. This includes the brake rotor and the brake caliper where the pads are situated.
- Illuminate the Area: Shine the flashlight directly at the brake caliper. This will help you to see the brake pads positioned on either side of the rotor.
Using a flashlight can expose signs of wear on the brake pads, including:
- Thickness: You can get a better visual of how thick the pads are. Ideally, they should be at least 1/4 inch thick. If they appear significantly thinner, it’s time to consider replacement.
- Cracks or Chips: Look for any visible cracks, chips, or holes in the brake pads. Damage like this can affect braking performance and indicates they need to be replaced.
- Uneven Wear: Make a note of any uneven wear patterns on the brake pads. This can indicate issues with your brake system.
Using a flashlight for inspection can save you time and money by allowing you to quickly assess the condition of your brake pads. However, remember that while this method is useful for a basic check, it is still crucial to consult a professional mechanic for a detailed evaluation and service if needed.
Measuring brake pad thickness
Measuring the thickness of your brake pads is a crucial step in ensuring your vehicle’s safety and performance. It’s essential to check this measurement regularly, even if you don’t want to remove the wheel. Here’s how you can do it effectively:
Tools Needed
- Caliper – A digital or mechanical caliper can provide precise measurements.
- Ruler – If a caliper is not available, a ruler can work for a rough estimate.
- Flashlight – To provide adequate lighting in confined spaces.
Steps for Measuring Brake Pad Thickness
- Ensure your vehicle is on a flat surface and securely parked.
- Use a flashlight to illuminate the brake assembly area.
- Locate the brake pads; they are typically visible through the wheel spokes.
- Carefully insert the caliper between the rotor and the brake pad, positioning it to measure the thickness of the pad. If you’re using a ruler, align it next to the pad.
- Take note of the measurement. A thickness of 1/4 inch (6.4 mm) or less indicates that the pads are nearing the end of their service life.
Understanding the Measurements
The following table outlines the typical thickness of brake pads and their implications:
| Brake Pad Thickness | Status |
|---|---|
| 1/2 inch (12.7 mm) or more | Good condition |
| 1/4 inch (6.4 mm) – 1/8 inch (3.2 mm) | Replace soon |
| Less than 1/8 inch (3.2 mm) | Immediate replacement required |
By following these steps to measure your brake pad thickness, you can monitor the wear and ensure your vehicle remains safe on the road. Regular checks at home can save you time and money down the line!
Consulting a professional mechanic
When it comes to maintaining your vehicle’s safety and performance, consulting a professional mechanic is crucial, especially regarding your brake pads. While DIY checks and visual inspections are helpful, there are times when the expertise of a trained professional is necessary.
A professional mechanic can provide a comprehensive evaluation of your brake system, ensuring all components are functioning properly. Here are a few reasons why seeking their assistance is beneficial:
- Expertise: Mechanics have in-depth knowledge of different brake systems and can identify issues that you may miss.
- Advanced Tools: They possess specialized tools and equipment that can accurately measure brake pad thickness and diagnose problems.
- Safety Assurance: A professional inspection can prevent potential failures that could put your safety at risk.
- Long-term Cost Savings: Early detection of worn or damaged brake components can save you from expensive repairs down the line.
When selecting a mechanic, it’s vital to choose one who is certified and has a good reputation. Take the time to read reviews or ask friends for recommendations.
Regular maintenance and timely consultations with a mechanic can extend the lifespan of your brake pads and enhance your driving safety. – Automotive Expert
In summary, while you can check your brake pads without removing the wheel, consulting a professional mechanic ensures you get a thorough assessment and peace of mind regarding your vehicle’s braking system.
Frequently Asked Questions
How can I check my brake pads without removing the wheel?
You can check the brake pads by using a brake pad gauge or looking through the wheel spokes to see the pad thickness.
What tools do I need to check brake pads without removing the wheel?
Typically, you only need a flashlight for visibility and possibly a brake pad gauge for accurate measurement.
Is it safe to inspect brake pads this way?
Yes, as long as you are cautious and ensure that the vehicle is safely parked, inspecting through the wheel is a common practice.
What signs indicate that my brake pads need replacing?
Signs include a squealing noise when braking, reduced braking power, or a warning light on the dashboard.
Can I determine the type of brake pads used without removing the wheel?
It’s challenging; however, you might be able to identify some features like whether they look semi-metallic or organic from the visible edge.
How often should I check my brake pads?
It’s advisable to check your brake pads at least once a month or during regular maintenance checks.
Are there any risks of not replacing worn brake pads?
Yes, ignoring worn brake pads can lead to decreased braking efficiency and potential damage to the braking system, which can be costly to repair.