
Learn how to locate the brake booster, inspect the vacuum hose, perform vacuum tests, interpret readings, and address potential issues effectively.Maintaining your vehicle’s braking system is crucial for your safety on the road, and understanding how to check your brake booster vacuum is an essential part of this process. The brake booster is a critical component that enhances your braking efficiency by increasing the force applied to the brake pedal. Over time, issues can arise, leading to a decrease in braking performance. In this blog post, we’ll guide you through the essential steps to check your brake booster vacuum, starting from locating the brake booster to interpreting the gauge readings and addressing any potential issues that may come up. By equipping yourself with this knowledge, you’ll be better prepared to identify and resolve problems, ensuring your vehicle remains safe and effective on the road. Let’s dive into the details!
Locating the Brake Booster
To begin your inspection of the brake system, it is essential to first locate the brake booster. The brake booster is a crucial component that helps amplify the force applied to the brake pedal, which is necessary for effective braking.
The brake booster is typically situated on the driver’s side of the vehicle, mounted directly to the firewall behind the brake master cylinder. Below are some steps to help you locate the brake booster:
- Open the hood: Start by ensuring the vehicle is turned off and in a safe position. Open the hood to gain access to the engine compartment.
- Identify the master cylinder: Look for the brake master cylinder, which is usually a round or rectangular metal or plastic reservoir. It often has a clear view of the brake fluid level.
- Trace the brake lines: Follow the brake lines from the master cylinder; they lead to the brake booster. The brake booster is generally a larger round canister mounted directly to the back of the master cylinder.
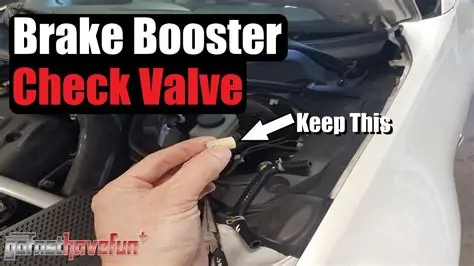
- Look for vacuum hoses: The brake booster will have a vacuum hose connected to it. This hose typically routes towards the engine intake or vacuum source.
Here’s a simple way to visualize the components:
| Component | Description |
|---|---|
| Brake Master Cylinder | The reservoir that supplies brake fluid to the braking system. |
| Brake Booster | A vacuum-assisted unit that enhances the braking force. |
| Vacuum Hose | The hose connecting the brake booster to the vacuum source of the engine. |
This step is essential for effectively performing further diagnostics and ensuring that the brake system operates safely. Once you have located the brake booster, you can proceed to the next part of the inspection process.
Inspecting the Vacuum Hose
To ensure your brake system functions effectively, it’s crucial to inspect the vacuum hose connected to the brake booster. A malfunctioning vacuum hose can lead to inadequate brake assist, resulting in potentially dangerous driving conditions.
Follow these steps to properly inspect the vacuum hose:
- Visual Inspection: Start by visually examining the vacuum hose for any signs of wear or damage such as cracks, splits, or fraying. This initial check can reveal obvious problems that may affect the vacuum pressure.
- Check Connections: Ensure that the hose connections at both ends are secure. Loose or disconnected hoses can cause a significant vacuum leak, impacting the performance of your brake booster.
- Feel for Softness: Gently squeeze the hose. It should feel firm and retain its shape. If the hose feels soft or mushy, it may be a sign of deterioration, indicating that it needs replacement.
- Listen for Hissing: With the engine running, listen carefully around the vacuum hose. A hissing sound can indicate a vacuum leak, which can lead to a loss of braking efficiency.
- Check for Obstructions: Inspect the interior of the hose if possible. Any debris or blockage can restrict the flow of vacuum pressure, leading to braking issues.
Make sure to reference the manufacturer’s specifications for your vehicle when performing these checks, as some vehicles may have unique features or requirements.
Tip: Regularly checking the vacuum hose, especially during routine maintenance, can help ensure optimal braking performance and extend the life of your brake booster.
By paying close attention to your vacuum hose, you can identify potential issues before they escalate, ensuring your safety and the effectiveness of your braking system.
Performing the Vacuum Test
Performing a vacuum test on your brake booster is a critical step in diagnosing its functionality. This test helps ensure that the brake booster is effectively creating the necessary vacuum required for optimal braking performance. Follow these steps to carry out the test correctly:
- Gather Required Tools: You will need a vacuum gauge, a hose, and basic hand tools for this operation.
- Locate the Brake Booster: First, find the brake booster, which is typically located at the rear of the engine compartment, attached to the master cylinder.
- Disconnect the Vacuum Hose: Carefully remove the vacuum hose from the brake booster. Be cautious not to damage the hose or connections.
- Attach the Vacuum Gauge: Connect the vacuum gauge to the brake booster’s vacuum port. Ensure that the connection is tight to avoid leaks.
- Begin the Vacuum Test: Start the engine and allow it to idle. Watch the gauge reading closely. A healthy brake booster should maintain a steady vacuum reading.
The gauge should ideally read between 18 to 22 inches of mercury (inHg). If the reading is significantly lower, there may be an issue with the booster or the vacuum supply.
Tip: If you’re unsure about gauge readings, refer to your vehicle’s service manual for specific vacuum levels recommended for your make and model.
After completing the vacuum test, turn off the engine and monitor the gauge. A functional booster should hold vacuum for a brief period even after the engine is off. If the reading drops immediately, it indicates a potential leak.
Performing the vacuum test is an essential part of maintaining your braking system. Recognizing how to check and interpret the vacuum will lead to safer driving experiences.
Interpreting the Gauge Reading
Once you’ve performed the vacuum test on your brake booster, the next step is to interpret the gauge reading correctly. The gauge will provide you with valuable information regarding the condition of your brake booster and the overall health of your vehicle’s braking system.
When examining the gauge, you typically want to see a steady reading that falls within a specified range. Below is a table that outlines the various ranges and their meanings:
| Gauge Reading (in inHg) | Interpretation |
|---|---|
| 18 – 22 | Normal: Your brake booster is functioning properly, indicating good vacuum pressure. |
| 15 – 17 | Low: There may be minor issues with the vacuum supply; further investigation is recommended. |
| Below 15 | Very Low: Indicates significant problems, possibly a leak in the vacuum system or a faulty brake booster. |
| Fluctuating Reading | Variable: This could suggest a problem with the vacuum source or obstructions in the hose. |
It’s important to keep in mind that various factors may influence these gauge readings. Always consider the following:
- Engine RPM: A higher RPM can generate more vacuum, potentially leading to a higher reading on the gauge.
- Temperature: Cold weather can affect engine performance and vacuum levels.
- Altitude: Higher altitudes generally result in lower atmospheric pressure, which can affect vacuum readings.
By understanding how to interpret the gauge reading, you can make informed decisions about potential repairs or adjustments necessary for maintaining a safe and effective braking system.
Addressing Potential Issues
When it comes to checking the brake booster vacuum, addressing potential issues is crucial for ensuring the safety and reliability of your vehicle. Here are several common problems you might encounter, along with solutions to help you resolve them:
| Issue | Symptoms | Possible Solutions |
|---|---|---|
| Damaged Vacuum Hose | Hissing noise, hard brake pedal |
|
| Faulty Brake Booster | Soft brake pedal, air leaks |
|
| Vacuum Leak | Decreased engine performance, warning lights |
|
| Contaminated Brake Fluid | Discoloration of fluid, braking issues |
|
If you experience any problems while checking the brake booster vacuum, it’s essential to consult a professional mechanic. Regular maintenance and prompt attention to issues can significantly enhance your vehicle’s braking performance and prolong its lifespan.
Frequently Asked Questions
What is a brake booster vacuum?
A brake booster vacuum is a component in a vehicle’s braking system that uses vacuum pressure to enhance the force applied to the brake pedal, allowing for more effective braking with less effort.
Why is it important to check the brake booster vacuum?
Checking the brake booster vacuum is important because any vacuum leaks or failures can lead to reduced braking efficiency, increased stopping distances, and potentially compromised safety.
What tools do I need to check the brake booster vacuum?
To check the brake booster vacuum, you typically need a vacuum gauge, a hand-held pump, and basic hand tools for accessing the brake booster.
How do I identify a vacuum leak in the brake booster?
You can identify a vacuum leak by listening for hissing sounds around the brake booster, checking for damaged hoses or connections, or using a vacuum gauge to ensure the vacuum level is within the manufacturer’s specifications.
What are some common symptoms of a failing brake booster?
Common symptoms include a hard brake pedal, longer stopping distances, increased effort needed to press the brakes, and irregular brake responsiveness.
Can I check the brake booster vacuum myself?
Yes, you can check the brake booster vacuum yourself if you have the necessary tools and mechanical knowledge, but consulting a professional is recommended if you are uncertain.
What should I do if I find a problem with the brake booster vacuum?
If you find a problem with the brake booster vacuum, you should address it immediately by repairing or replacing the affected components to ensure your vehicle’s braking system operates safely and effectively.